What comes to your mind when you think about carving wood? Maybe you’re intrigued by the art of woodworking or the creative process behind transforming a raw piece of wood into something beautiful and functional. If you’ve ever wondered what the easiest thing to carve from wood is, you’re in for a treat! Let’s unpack this topic together, and hopefully, you’ll feel inspired to embark on your own woodcarving adventure.

Understanding Wood Carving Basics
Before jumping into the easiest items to carve, it’s essential to grasp the fundamentals of wood carving. Wood carving is an age-old art form where various tools are used to shape pieces of wood into artistic figures, functional objects, or decorative pieces.
Why Carve Wood?
Carving wood gives you a chance to express your creativity. It’s not just a hobby but a satisfying way to relax and focus. Many enjoy the sense of accomplishment that comes from transforming a simple block of wood into something extraordinary. Plus, the skills you develop can lead to more complex projects as you gain confidence.
Types of Wood for Carving
Choosing the right type of wood is crucial for getting started. Softer woods like pine, basswood, and butternut are some of the best options for beginners due to their ease of carving.
| Wood Type | Characteristics | Best For |
|---|---|---|
| Pine | Soft, readily available, inexpensive | Simple projects |
| Basswood | Very soft, has minimal grain | Detail work |
| Butternut | Medium softness with a pleasant aroma and grain | General carving |
| Cedar | Aromatic and resistant to decay | Small items, outdoor use |
By selecting the right wood, you can make your carving experience more enjoyable.
What is the Easiest Thing to Carve from Wood?
Now, let’s answer the burning question: What is the easiest thing to carve from wood? While this can be subjective, there are several items that nearly anyone can tackle with a little patience and practice.
Simple Shapes
One of the easiest and most fundamental things to carve is simple shapes. This serves as an excellent introduction to learning to control your tools.
Block Figures
Creating block figures is an excellent starting point. You can begin with a rectangular block and gradually carve away parts to form a person, animal, or any character you like. This allows you to practice your carving while exercising your imagination.
Pros and Cons
| Pros | Cons |
|---|---|
| Easy to learn | Limited detail |
| Quick projects | May not be very fulfilling |
| Useful as an introductory step | Can become repetitive |
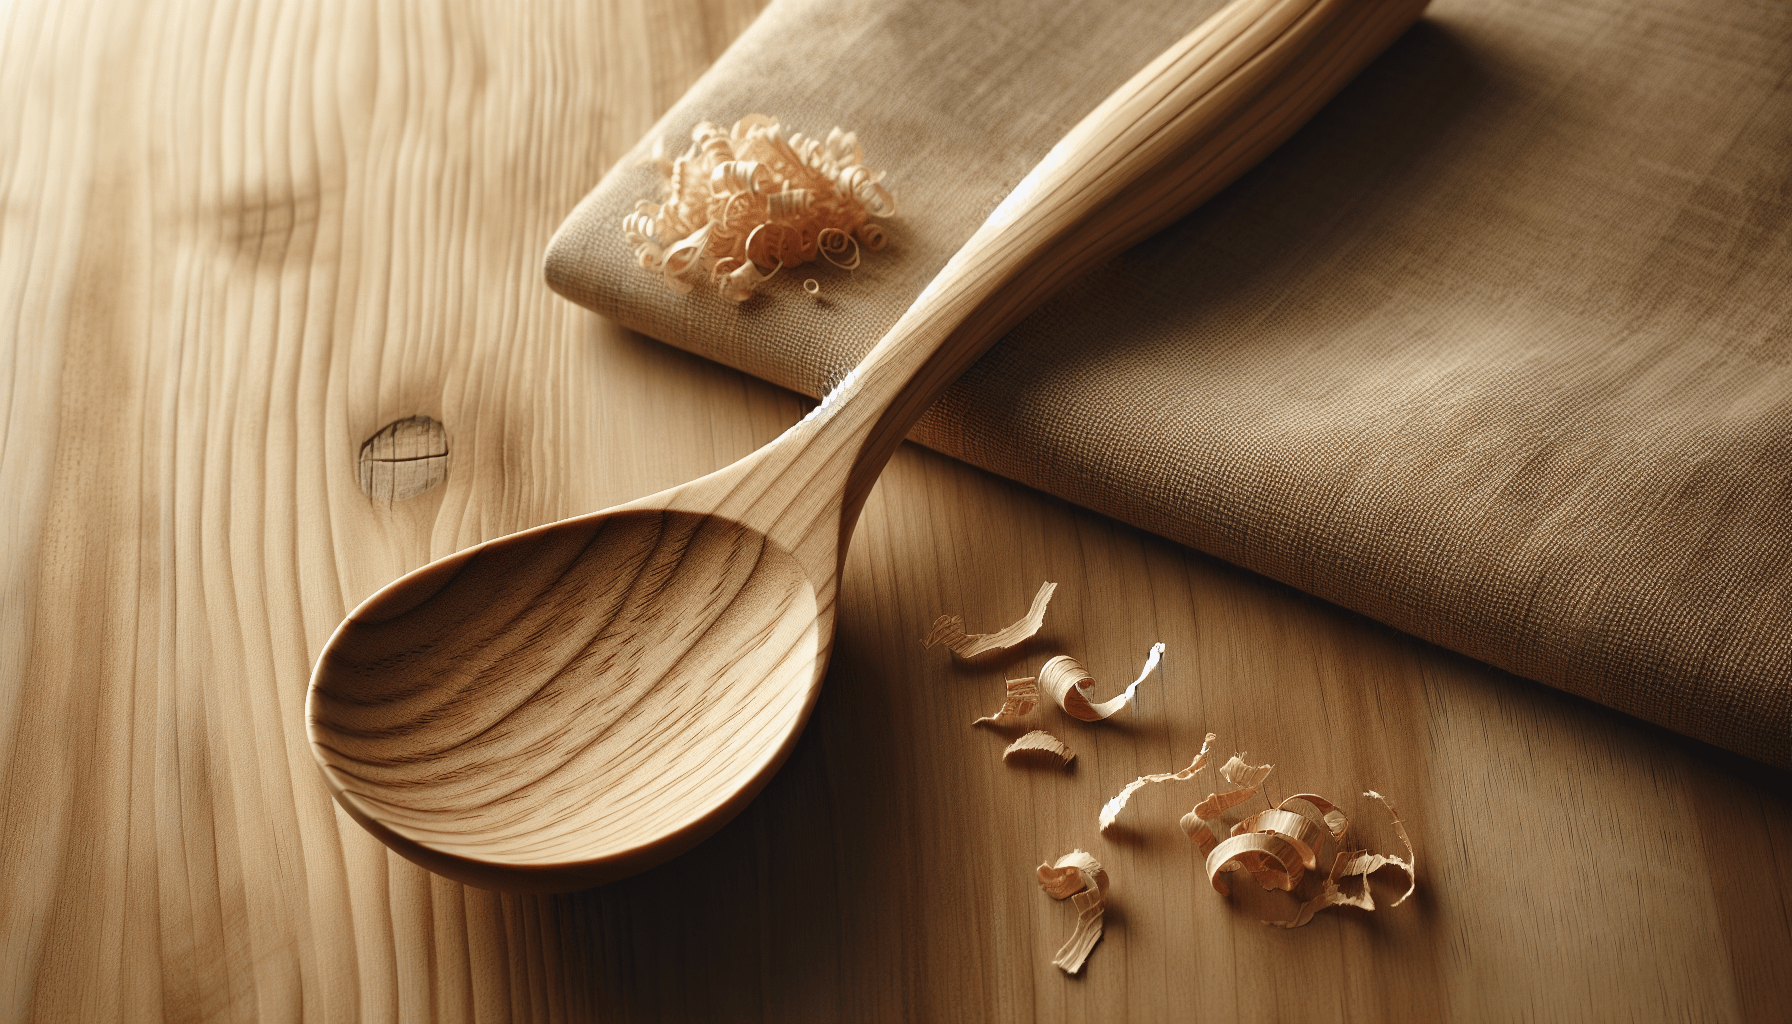
Spoons
Carving a spoon is not only practical but also incredibly satisfying. This project allows you to utilize various carving techniques while creating something functional.
Why Spoons?
Spoons require minimal materials and are versatile for beginners. They can be made in different styles, sizes, and shapes, which allows for a wide range of creativity.
Steps to Carve a Spoon
- Select Your Wood: Choose a piece of soft wood.
- Draw the Design: Sketch your spoon shape on the wood.
- Cut the Rough Shape: Use a knife or saw to cut it out.
- Carve the Bowl: Carefully scoop out the bowl using a carving knife or gouge.
- Shape the Handle: Spend time ensuring the handle feels comfortable in your hand.
- Sand for Smoothness: Finish with sandpaper to create a smooth finish.
Whistles
Carving a whistle can be a fun project that yields a delightful sound! This miniature woodwork requires a bit more precision but is still accessible to beginners.
Why Whistles?
Whistles combine both function and art. You get to experience a bit of engineering while you create something unique.
Steps to Make a Whistle
- Choose Your Wood: Opt for a straight-grained piece.
- Create a Cylinder: Cut a section of wood to your desired length.
- Drill the Airhole: This requires a drill and specific measurements to produce sound.
- Shape the Mouthpiece: Carve out a comfortable mouthpiece.
- Sand and Finish: Ensure all edges are smooth.
Simple Animals
If you enjoy carving figures, simple animals can be a delightful option. Consider starting with basic shapes like a bird or a fish.
Steps to Carve a Simple Bird
- Select Your Wood: Pick a soft, manageable type.
- Outline Your Design: Sketch a bird shape on the block.
- Rough Out the Shape: Cut away the bulk of the excess wood.
- Define Features: Carve the beak, tail, and wings.
- Finish the Piece: Sand and add finishing touches to bring your bird to life.
Tools You Will Need
To get started with wood carving, you’ll need a basic set of tools. Here’s a quick overview of what you might consider adding to your toolkit.
Essential Carving Tools
| Tool | Purpose |
|---|---|
| Carving Knife | For general shaping and detailing |
| Chisel | To scoop out material, especially for bowls |
| Gouge | For rounded cuts and creating curves |
| Sandpaper | To smooth surfaces and edges |
| Whittling Knife | A versatile tool for detailed work |
As you progress, you might discover more specialized tools that cater to your specific projects.
Tips for Beginners
Embarking on a wood carving journey? Here are some practical tips to help you get started without feeling overwhelmed.
Choose the Right Project
Start with simpler projects to build your confidence. Don’t rush into complex designs. Pick something you’re genuinely excited about, as that will keep you motivated!
Take Your Time
Patience is key in carving. It’s tempting to rush, especially when you want to see the final product. But slowing down allows you to focus on the details and reduces the chance of mistakes.
Practice Safety First
Always prioritize safety when using tools. Keep your hands clear of cutting paths and use protective gear, such as gloves or goggles, if necessary.
Join a Community
Consider joining a local woodcarving club or online forum. Here, you can connect with others, learn new techniques, and find inspiration while sharing your progress.

Common Mistakes to Avoid
Every beginner makes mistakes along the way. Here are a few common pitfalls and how to avoid them.
Rushing the Process
Impatience can lead to errors. Take your time, and remember: Good work requires time and dedication.
Not Practicing Proper Tool Care
Taking care of your tools ensures better performance and safety. Regularly sharpen and clean them to prolong their life.
Ignoring the Grain
Always pay attention to the wood grain. Carving against the grain can result in splintering, ruining your work.
Advanced Projects for the Future
Once you’ve mastered the basics, you may want to challenge yourself with more advanced projects.
Intricate Designs
Once you’re comfortable with simple shapes, try your hand at more detailed carvings like intricate animal figures or human faces.
Functional Items
Consider creating items that combine aesthetics and utility, such as furniture or decorative shelves. This can be an exciting way to express your creativity while crafting something long-lasting.
Relief Carving
For something entirely different, try relief carving. In this technique, you carve out figures from a flat piece of wood, creating a three-dimensional effect.
How Carving Can Enhance Your Skills
Engaging in wood carving isn’t just about crafting beautiful objects; it also offers a myriad of cognitive and emotional benefits.
Enhancing Focus and Patience
The meticulous nature of carving requires focused attention, which can significantly improve your concentration.
Boosting Creativity
Every piece you create is an expression of your unique creativity. Carving allows you to explore new ideas and hone your artistic skills.
Feeling Accomplished
Completing a carving project provides a sense of achievement. It can uplift your spirits and motivate you to take on new challenges.
Conclusion
Finding the easiest thing to carve from wood opens up a world of creativity and fun. Remember, every master was once a beginner. So don’t shy away from starting with simple projects like spoons or block figures.
Carving wood is not just about creating objects; it’s about expressing yourself, building patience, and significantly enhancing your focus. Take your time, enjoy the process, and soon enough, you’ll be crafting beautiful works of art that you can be proud of.
Now that you’ve gathered so many tips and insights, which project will you start next?